OpenGD77 is the radio firmware alternative for the Radioddity models GD-77 & GD-77S, the Baofeng models DM-1701, DM-1801, DM-1801A & RD-5R, the TYT models MD-9600 & MD-UV380 and the Retevis models RT-3S, RT-90 and RT-84 DMR radios.
The OpenGD77 firmware gives new life to these radios with a more user friendly operating system and a host of new features including access to amateur satellite predictions and communications.
If you own one of the radio models listed above and wish to look into updating yours, please refer to https://www.opengd77.com/ for the latest firmware and CPS file versions as well as details on how to update your radio.
OpenGD77 codeplug for the Retevis RT3S & TYT MDUV380)
The codeplug and the CPS (programming software) for the RT3S and MDUV380 running OpenGD77 are quite different (and significantly improved) compared to that used with the factory firmware. The new CPS doesn’t have any of the limitations and issues of the factory programmer and the codeplug is much easier to create and is more logical to get your head around. For example, the original factory codeplug required one channel for every talk group, so if you wanted access to 30 different talkgroups on your local DMR repeater you had to create 30 separate channels – one for each talkgroup. With over 60 DMR repeaters and more than 45 talkgroups that’s over 2700 channels just to cover the AU DMR repeaters. The new codeplug only requires one channel for each repeater and applies talkgroups from a separate list, making programming much easier. The CPS also allows exporting and importing of CSV files so you can create and edit your channels in bulk using a spreadsheet which makes the job much faster.
As with the standard RT3S and MD-UV380, Ive created an Australian codeplug for the OpenGD77 version of these radios. In addition, each channel is geolocated with its GPS position which allows the radio to display the distance from you to the selected repeater. This makes it easy to find your local repeater. Simply scroll through the repeaters list until you find the nearest one.
The codeplug below contains:
- All Australian DMR Repeaters.
- All Australian Brandmeister Repeaters.
- All Australian FM repeaters (from the current Repeater book database as at September 2023).
- Three Hotspots – a DMR Duplex, a DMR Simplex and a Brandmeister. Simply add your own Hotspot frequencies. You can also include your home GPS position in the channel settings.
- All current VKDMR compatible DMR Talkgroups.
- A range of Brandmeister Talkgroups.
- A range of other useful channels.
OpenGD77 Codeplug Download:
[Codeplug updates]
- September 24, 2023: Added ‘Local Rptrs‘ Zone to hold your local repeater channels. The Port Macquarie region (VK2RCN/VK2RPM) DMR & FM repeaters are installed in this zone by default. For other regions, change these to your own local repeater channels as desired.
- September 22, 2023: Updated Band Limit settings and added three additional Brandmeister repeaters.
- September 21, 2023: Moved all three hotspot channels to a single hotspot zone.
Instructions:
You should always refer to the OpenGD77.com website to obtain the latest CPS and firmware update for your radio. Please note that whenever a new firmware update is released it usually comes with a new CPS. This is because new features in the firmware often require additional support from the CPS. It is therefore important that when you update your firmware you also update the CPS at the same time. This instruction assumes you are running the most recent firmware and compatible CPS.
- Download the OpenGD77 codeplug using the link below. Extract the zip file to a folder on your PC.
- Connect your RT3S/MD-UV380 to your PC using the programming cable and switch the radio on.
- Run the CPS.
- Select the ‘Program’, ‘READ’ option from the menu to read the radio into the CPS. This retrieves your radios current settings.
- If you haven’t already done so, save your current settings to a separate codeplug file (‘File’, ‘Save’) so you can reinstall them later if necessary.
- Open the new codeplug (‘File’, ‘Open’) to load it into the CPS. You should now be able to see all the new channels, zones and talk groups etc in the CPS by clicking the + next to the folders in the ‘Tree View’ on the left of the window.
Customisation:
The codeplug is supplied in generic form so you will now need to make some minor changes to customise it to your application.
- Double click ‘DMR ID and Callsign’. In the window that appears, enter your call sign and DMR ID. The radio will use these for its identity.
- Double click ‘Boot Screen’. Display mode should be set to TEXT.
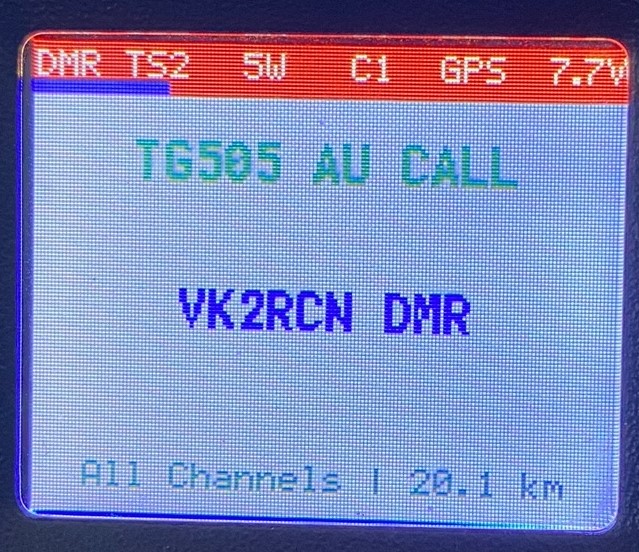
- Next to ‘Line 1’ enter your call sign. Next to ‘Line 2’ enter your DMR ID. These two lines will be displayed on the start up screen when your radio is switched on.
- ‘Band limits’, ‘DTMF Settings’ and ‘APRS’ should be left at their defaults.
- Click the + next to ‘Channels’. The channel list will open and you will see all the channels installed in the code plug. If you have a hotspot, here is where you can set the frequencies to match yours. There are three hotspot channels pre-installed, a Simplex DMR, a Duplex DMR and a Brandmeister. Select the hotspot description that matches your hotspot and double click it. A window will open showing all the settings for that channel.
- Change the RX and TX frequencies to match those of your hotspot.
- Enter the latitude and longitude of your hotspot location (normally your home location). This will allow your radio to display your distance to your hotspot. Make sure ‘Use Location’ is ticked so the radio knows to make use of these coordinates.
FOR DETAILS ON HOW TO OBTAIN YOUR HOME COORDINATES PLEASE REFER TO THE COORDINATES SECTION FURTHER BELOW. - Under the ‘TG List’ option, select the talkgroup list you want to use from the drop-down list (the default is DMR Mix). The codeplug has four preinstalled talkgroup options, DMR AU/NZ, DMR International, DMR Mix (a mix of the two) and Brandmeister. Separate TG lists were required as there is a limit of 32 talkgroups per TG list, which means its not possible to include ALL the TGs in one list. For this reason the DMR Mix list contains a mixture of AU, NZ, and International talkgroups that you are most likely to use.
Note: If you wanted to, you could create duplicate channels of repeaters with their own ‘TG list’ settings e.g. you could create two VK2RCN DMR channels -one with AU/NZ talkgroups and one with International talkgroups. Then you simply switch between the two repeaters to move from local to International talkgroups. - Once you have made the above changes, save the codeplug under a new name (I include the date). Once it is saved, select ‘Program’,’Write’ to write the codeplug to your radio.
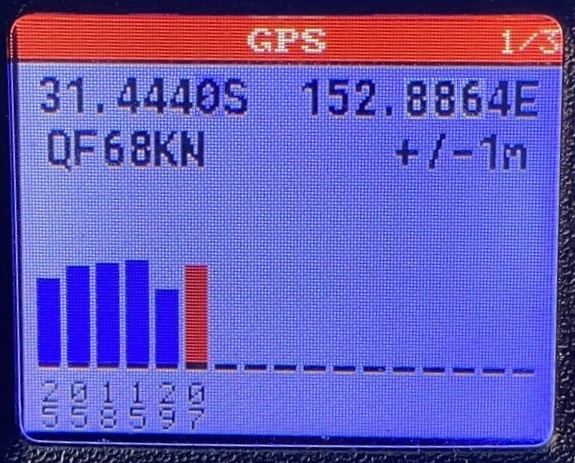
Once the radio has restarted it should now display a Talkgroup at the top, the selected repeater or Hotspot in the middle and the Zone at the bottom. After initial codeplug programming the zone setting defaults to ‘All Channels’. The distance to the selected repeater will also be displayed in the lower right however, it wont display anything until your radio has obtained a position using GPS or through manual position entry.
Zones:
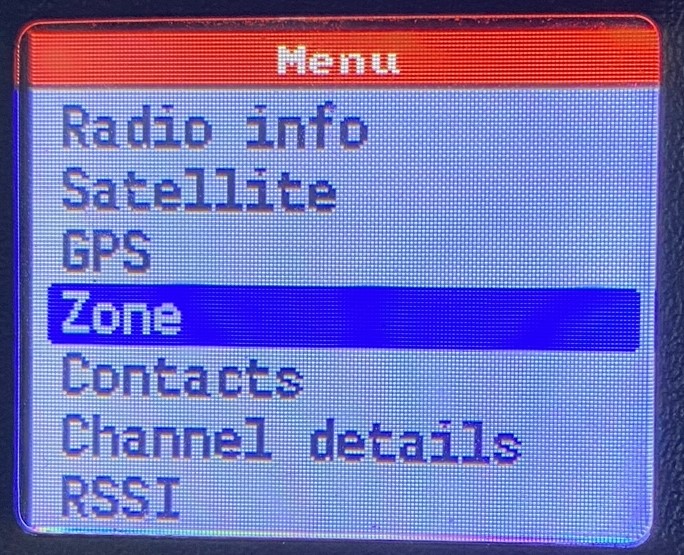
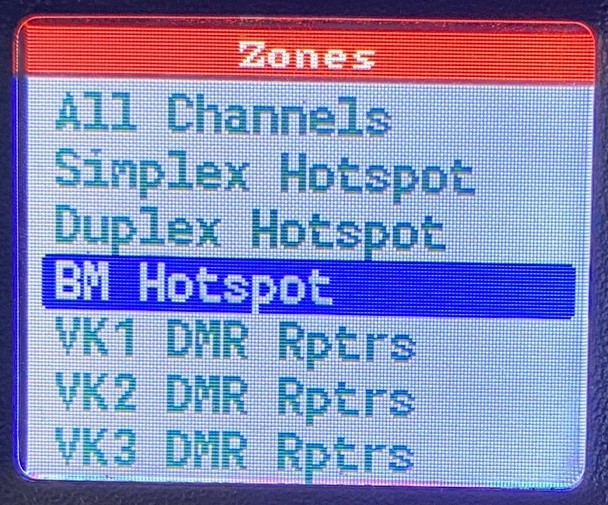
Rotate the channel switch to change zones. Since ‘All Channels’ is enabled by default, the channel switch will give you access to every channel in the radio. Because there are a lot of channels, it can make it both difficult and time consuming to find what you want. Here is where Zones make it easier for you. Press the green key to access the menu, select ‘Zone’ then press the green key. Use the Up/Down keys to select the desired zone (e.g. ‘VK2 DMR Rptrs’) then press the green key to select it. The radio will return to normal operation with the selected zone (‘VK2 DMR Rptrs’) displayed at the bottom. Now, rotate the channel switch. Only channels within the selected zone are available making it easier to find the channel you want. If you only want to access your hotspots, select the Hotspot zone to make it easier to switch between your hotspots when you’re at home.
Coordinates:
If you want to find the coordinates of a specific location to include in the channel data, this is can easily be done on your PC using Google maps in your browser. For example if you need to know the coordinates of your house to add to your hotspots channel setting you can use this method.
Open a browser window on your PC and in the top address bar type ‘maps’. The browser will open in the Google Maps window. In the map search bar type in the location you need, e.g. an address or a town name, or simply drag the map to the location you need. Zoom in for more detail. Once the desired location is displayed, right click the mouse at that location. A pop-up window will appear and the coordinates for that location will be displayed in degrees & minutes decimal format (e.g. -32.86865, 151.74730. This is the exact format the OpenGD77 CPS requires for coordinates in the channel settings. Simply copy these numbers, including the – sign, into the Latitude / Longitude fields in the channel window (the -32.86865 is the Latitude and the 151.74730 is the Longitude) then save the channel.
Alternatively, if you have the grid square coordinates of a location, e.g. QF68KN, go to https://www.qrz.com/gridmapper and enter the grid and press SET and the page will display the Lat/Long details for you.
Extras:
The ‘Extras’ menu in the CPS provides some additional useful features.
Callsign Database: Use this to download a user database containing call signs, names and locations from RadioID.net (or import from an alternate CSV database). If the database contains world wide data, you can use the ‘Region’ field to enter the DMR ID country identifier to download just a specific country e.g enter 505 to download just the Australian users. If you want data from multiple countries simply type a new country identifier in the ‘Region’ field and click the Download button again. The new country data will be added to those you’ve already downloaded (scroll down through the list to view them). If you make a mistake simply click the ‘Clear’ button and start again. When you have the desired list of countries click ‘Write to Radio’ to transfer them to your radio. Note the ‘Data Record Length’ option. This determines how many characters of the data are transferred. Too few and the data will be cut short. If you want the full set of data for each user select the maximum value of 50. However note that this will reduce the total number of entries you can transfer. Unless you are transferring the entire world wide data set this shouldn’t be an issue for you.
Boot Melody: When your radio turns on, it plays the short Morse message dah-di-dah-di-dah. You can change this easily to any Morse message you like using the Boot Melody option. For example you can make it play your call sign in the same way a CWID does on a repeater. Here are some details on how to do this.
The boot melody creates Morse characters using a series of 4 numbers for each dit and dah. e.g 38,6,0,2 represents a dah and 38,2,0,2 represents a dit.
The first number generates the Morse tone frequency, the second is the length of the tone (6 for a dah and 2 for a dit), the third is set to 0 which switches the tone off and the fourth determines how long the tone will be off. For normal dits and dahs within a character, the fourth number is set to 2, however if the dit or dah is at the last one in a character then the fourth number is a 6 which creates a character space. All numbers are separated by commas. If you put the two number examples (above) together to create dah-dit (Morse for the letter ‘N’) it would look like this: 38,6,0,2,38,2,0,6 . Note the last number is changed to a 6 to represent then end of the character.
By combining these groups of numbers you can assemble dits and dahs to create your CWID in Morse code. The only additional condition is that the very last dit or dah only requires the first two numbers and no comma at the end. i.e if the last item is a dah, use 38,6 and if its a dit, use 38,2
For example, my call sign VK2GL is represented by 38,2,0,2,38,2,0,2,38,2,0,2,38,6,0,6,38,6,0,2,38,2,0,2,38,6,0,6,38,2,0,2,38,2,0,2,38,6,0,2,38,6,0,2,38,6,0,6,38,6,0,2,38,6,0,2,38,2,0,6,38,2,0,2,38,6,0,2,38,2,0,2,38,2
The number 38 identifies the start of each dit or dah and you can identify which it is by the second number (2 for dit and 6 for dah). Where the 4th number is a 6, the character has been completed and a character space is being added. The very last dit or dah only has two numbers and no comma following which terminates the Morse code.
Lastly, to change the tone frequency, change the first number (38) to another number. To change the speed, pick a new number for the dit length then make the dah and space lengths 3 times the dit length. e.g. if you slow the Morse by making the dit number = 4 then the dah and character space numbers must be 3 x 4 = 12 etc.
Please note: The OpenGD77 team are regularly updating both the firmware and the CPS. Please refer to the the OpenGD77.com website to make sure you have the latest firmware and CPS. If you update to the latest firmware you must also update to the latest CPS as any new features in the firmware will usually require the latest CPS to support them.
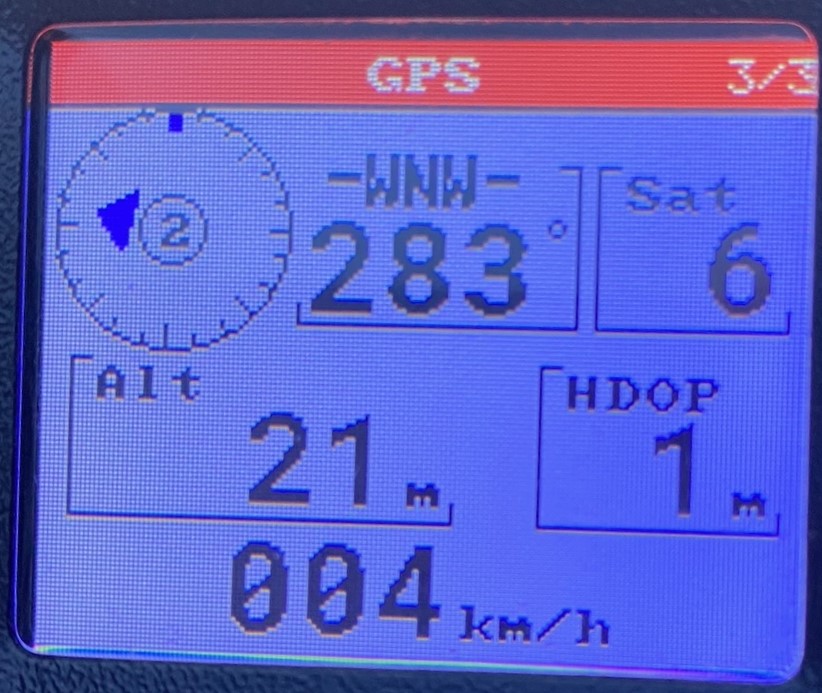
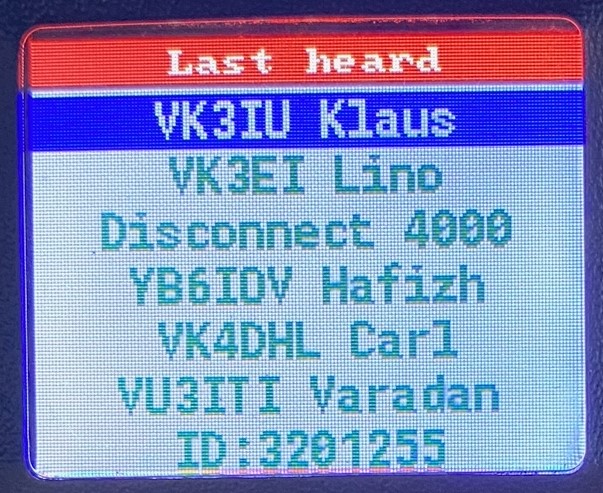
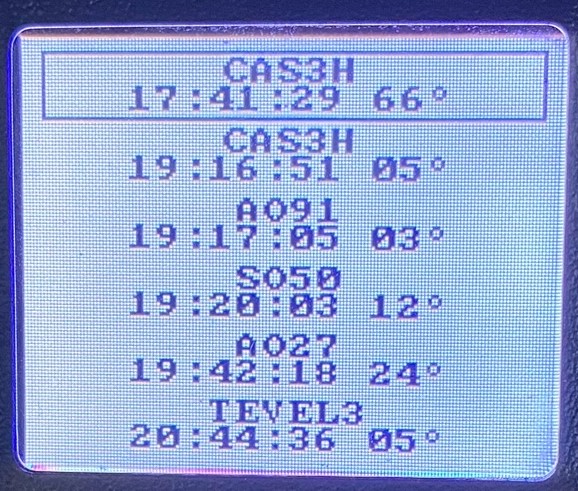
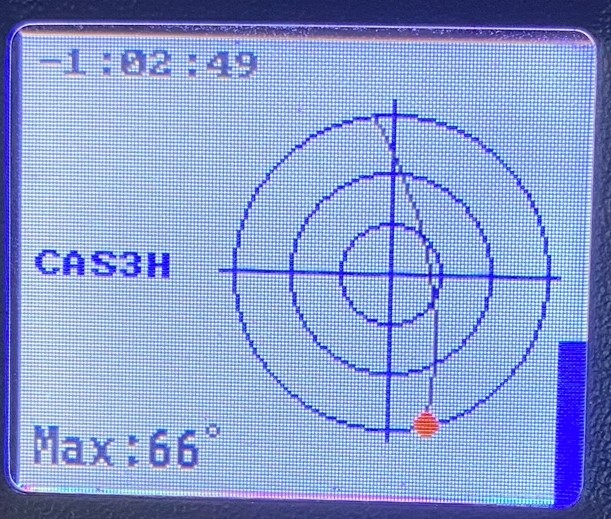
Below are example images showing some of the features of the Retevis RT3S (GPS Model) with OpenGD77 installed.