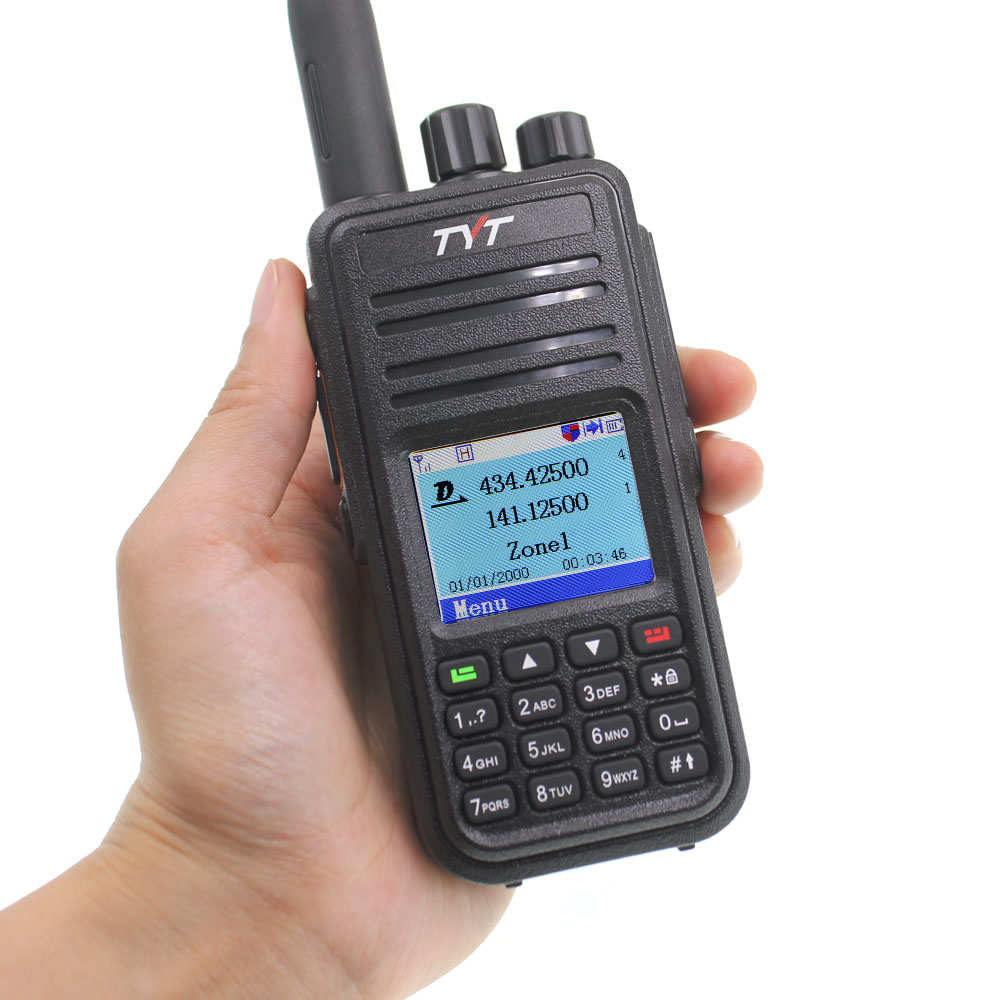
The Retevis RT3S is a DMR/FM Dual Band handheld radio for Amateur DMR use. It has become a very popular handheld radio for DMR use and has an excellent reputation. It is also priced very well making it a great choice as your first DMR radio.
The RT3S is also distributed as the TYT MD-UV380.
OPENGD77
If you have updated your RT3S/MD-UV380 to the OpenGD77 firmware, go to OpenGD77 VK Codeplug for a complete Australian codeplug compatible with the OpenGD77 firmware along with tips on installing and use it.
For details on the OpenGD77 project go to https://www.opengd77.com/
Programming – Programming Information and software.
Programming Tips – Resolving Issues
Firmware – Links and tips on downloading and installing firmware updates.
Downloading User Contacts – Adding user contacts to your radio
Codeplug Download – Download and install the Australian ORARC codeplug.
G6AMU Codeplug Editor – A useful alternative for editing your codeplug
PROGRAMMING SOFTWARE (CPS)
The programming software supplied by Retevis seems to work quite well although it does have some issues (these are discussed further below).
The RT3S programmer allows you to set all your radio’s operational settings, programmable buttons, contacts, group Lists, channels and zones. As with most DMR programmers there is a learning curve connected to understanding how the DMR system works, however the programming method is fairly logical. For large channel and zone edits you can export channels to a CSV file for editing in Excel or LibreOffice. This can then be imported back into the programmer.
The programmer also provides the ability to upload User Contacts (maximum of 120,000) from a CSV file to display the names, call signs and locations of incoming callers on your radio’s display. The Ailunce website provides a useful web-based tool for creating a customised CSV file. More on this further below.
For the latest version of the official Retevis RT3S CPS go to the Ailunce Resource Centre at https://www.ailunce.com/ResourCecenter . Scroll down to the ‘Retevis Amateur Radio CPS & FW’ section and select the RT3S option. Save the file to your computer then extract it to a folder. Inside this folder will be two additional folders. Open the ‘RT3S Software’ folder to access the CPS Programmer software. Inside will be two additional folders supporting both GPS and non-GPS versions of your radio. If your RT3S includes a GPS, open the ‘RT3S_GPS_Software’ folder and run the installer, otherwise install the ‘RT3S_Software’ version for non-GPS radios.
To program your radio
- Switch your radio OFF (if the radio is switched on when you connect it to the PC, your PC will not recognise it).
- Connect the radio to the PC using the programming cable.
- Switch the radio ON.
- Run the CPS programmer. The ‘Basic Information’ window will appear. Some of the fields will be blank.
- Click ‘Program’, ‘Read from Radio’ to read the contents of the radio into the programmer. The ‘Basic Information’ window should now display all the hardware details from your radio. You can now edit your radio.
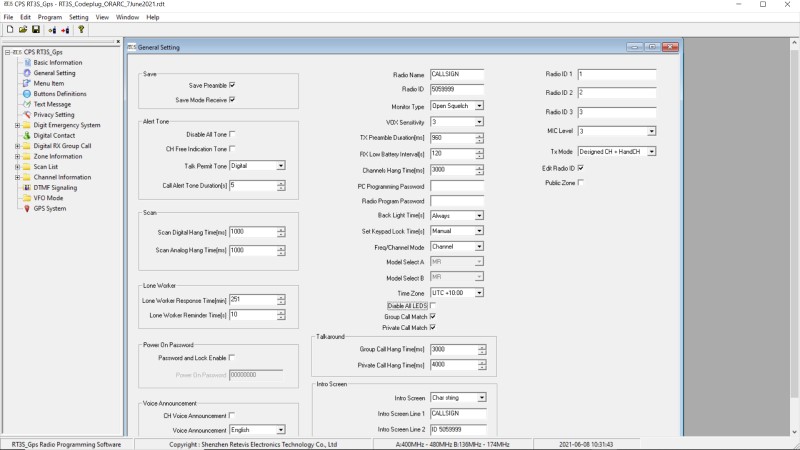
You should first select the ‘General Setting’, ‘Menu Item’ and ‘Buttons Definitions’ options on the left and setup your radio the way you like it. In the ‘General Setting’ option, enter your call sign in the ‘Radio Name’ field. Enter your DMR ID in the ‘Radio ID’ field.
The ‘Menu Item’ setting determines which items will be available from the radio’s menu. Tick the menus that you want to access from the radio and un-tick those you don’t.
The ‘Buttons Definitions’ option allows you to assign functions to the two side buttons (above and below the PTT).
When programming contacts, channels and zones, they must be created in the following order:
- Digital Contacts
- Digital RX Groups
- Channels
- Zones
Digital Contacts: Start by entering your contacts. These will be your talk groups. Enter a contact name, select a call type and enter an ID for that contact. For example talk group 505, enter ‘TG505’ as the name, select ‘Group’ as the call type and ‘505’ as the Call ID. Call Receive Tone should be set to ‘No’.
Digital RX Groups: For every talk group you have in your Digital Contacts, you must create a matching RX Group. Label the RX group with the same name as its associated talk group. The ‘Available Contact’ list contains all the digital contacts you entered earlier (this is why you must enter your digital contacts first – so they will be available here).
e.g. To create a RX Group for talk group 505, change the ‘Group List’ field to ‘TG505’, select your ‘TG505’ digital contact from the ‘Available Contact list and click the right-arrow button to transfer it to the ‘Contact Member’ list. Each RX Group should contain just one digital contact . When you are finished you should have one RX Group for each Digital Contact member and each RX group should only contain just the one matching member.
Channels: When creating channels it is best to start by creating one channel and configure it to be the way you want it i.e. set is as Digital or Analog, set the TX power, squelch and TOT etc. Now add your frequencies, talk group, RX group and Time Slot, etc. Once you have one channel completed, use the ADD button to create a number of additional empty channels. On the left-hand side right click on the name of your first completed channel and select ‘Copy’ from the popup menu. Now right click on each of the new blank channels you just created and select ‘Paste’ from the popup menu. This will duplicate your first channel into each of the new channels. All you need to do now is to select each one and edit the frequencies, talk group, RX group and time slot on each of the new channels.
Zones: One you have create your channels you can create zones and add your channels to them (you must have created your channels first).
PROGRAMMING TIPs
Editing Zones: When using the manufacturer’s programming software, once you create zones and add your channels to them, you cannot add new channels to your zones without corrupting the channel order in the zones that follow. i.e if you add a channel to a zone, it has a follow through effect on the following zones, pushing channels from one zone into another. Similarly deleting a zone or even a channel will also have a follow through affect on the channels in the zones that follow.
Reordering Zones and Channels: The manufacturer’s programming software does not provide a way to delete or re-order your zones. Once you have created them you are stuck with the original format. If you delete a zone and add it further down it will affect all the zones and channels from the deleted zone onward.
Solution: Download the N0GSG Contact Manager program from http://n0gsg.com/contact-manager/. This third-part program by N0GSG provides a number of features not available in the manufacturer’s program. It can open codeplugs from a range of DMR radio models, allowing you to edit, reorder, delete and add channels without affecting the rest of the codeplug. It can also be used to convert codeplugs from one radio form to another. Once you have finished your edits, save your codeplug and reload into the manufacturer’s program to write it to the radio.
FIRMWARE
The firmware is your radio’s own operating system. To check your radios firmware version press the Menu key to access the menu. Scroll down to the ‘Utilities’ option and press Confirm. Scroll to the ‘Radio Info’ option and select Confirm. Scroll to ‘Version’ and press Confirm. The radio’s present firmware version will be displayed along with the version of the CPS used to program it.
The latest firmware for the RT3S can be downloaded from the Ailunce Resource Centre at https://www.ailunce.com/ResourCecenter . Scroll down to the ‘Retevis Amateur Radio CPS & FW’ section and select the RT3S option. Save the file to your computer then extract it to a folder. Inside this folder will be two additional folders. Open the ‘RT3S-firmwareVx.xx’ folder (where x.xx is the version number). Included in this folder is an .exe program for installing the firmware. Run the ‘FirmwareDownloadVx.xx.exe’ file to install the firmware downloader program.

There are also four firmware .bin files provided. Two of these .bin files have “GPS” in their filenames – these are for the GPS version of the RT3S. The other two are for the non-GPS version. To prevent confusion I would suggest deleting the two .bin files that do not match your radio. Of the two remaining .bin files, the (rec) version provides support for voice recordings, while the (csv) version supports the display of user contacts in CSV format. You will need to decide which feature you want in your radio.
UPDATING THE FIRMWARE
To update the firmware you need to put the radio into it’s ‘Firmware Update’ mode. To do this, switch the radio OFF then hold the PTT key AND the key directly above it while switching the radio ON. The display will be blank and the LED will flash Red/Green to indicate the ‘Firmware Update’ mode is selected.
Connect the programming cable to the radio and plug it into the PC. Now run the Firmware Download program that you installed earlier. In the ‘User Program’ section, click the ‘Open File Upgrade’ button and point to the desired .bin file you downloaded earlier. Make sure you select the file that matches your radio (GPS or non-GPS) and has the desired feature (rec or csv). The selected filename will appear in the ‘User Program’ field. Now click the button labelled ‘Download file of Upgrade’ and wait for the firmware to be installed. If the install was successful the screen will display “Download Upgrade File Successful”.
Switch the radio off, remove the programming cable and switch it on again. The radio should restart normally. Follow the steps described above to re-check the firmware version. The version number displayed should match the firmware file you installed.
DOWNLOADING USER CONTACTS
If you have installed the firmware that supports CSV files you will be able to load a user contact CSV file to your radio. The user contact file, obtained from the RadioID website, contains the DMR ID, name and address details for every DMR user world wide. Unfortunately the RT3S only has room for 120,000 contacts and the world database is currently closer to 200,000 contacts. This means you will need to be selective in the contacts you include to limit the number of contacts in the CSV file to less that 120,000.
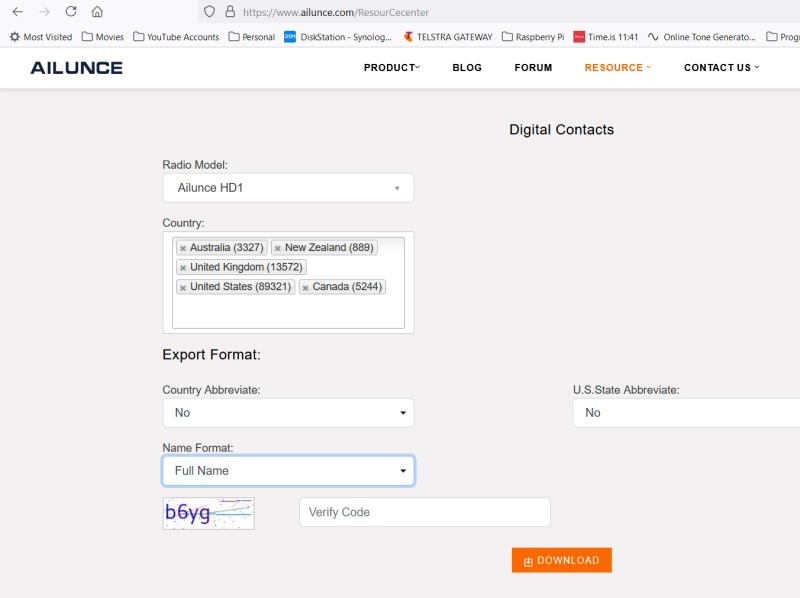
Luckily the Ailunce website has a web utility that allows you to selective choose and download contacts from selected countries for your CSV file. Go to https://www.ailunce.com/ResourCecenter and scroll to the bottom of the page to the ‘Digital Contacts’ section. Enter your radio model. This will ensure the format of the CSV file exactly matches the radio you are using. Now select the countries you want to include. Each country you select will display the number of contacts for that country e.g. as of June 2021 the numbers were Australia (3327), NZ (889), USA (89321), Canada (5244), UK (13572), etc. You can also choose whether to abbreviate the country name and display First and Last names. After downloading the CSV file, if you wish to further reduce the number of contacts you can manually edit it using Excel or LibreOffice.
INSTALLING USER CONTACTS
To install the contact list, run the programmer, connect your radio via the programming cable and switch the radio on. Select ‘Program’, ‘Read Data’ to read the radio.
Now select ‘Program’, ‘Write Contacts’. A popup window appears. Select the ‘Import’ button and point to the CSV file. Follow the steps to upload the file to the radio.
If you get an Excel error it means you don’t have MS Excel installed (the RT3S program uses a library that is part of MS Excel. You can get around that by installing the Microsoft Excel trial copy and allowing the trial period to expire. After the expiry the RT3S programmer continues to be able to access the required library.
Turn on the Contacts CSV Option in your radio
To view the installed User Contacts you need to enable the Contacts CSV option in your radio as follows:
- Press Menu and scroll to ‘Utilities’.
- Select ‘Radio Settings’ and press Confirm.
- Scroll to ‘Contacts CSV’ and press Confirm
- Select ‘Turn On’ and press Confirm.
Note: The ORARC codeplug included below contains all Australian and NZ users as Digital Contacts i.e they are included in the radio’s talk group list. This allows the radio to display basic Australia and NZ contact information (call sign and first name). Once you turn on the CSV option your radio will display greater detail about the incoming caller based on the content in the uploaded CSV file.
THE ORARC CODE PLUG FOR THE RETEVIS RT3S
Latest Update – October 17, 2023
The codeplug originally released on June 9 2023 at the ORARC Field Day inadvertently had TX Power set to LOW for all DMR repeaters. This may have prevented some users from accessing their local DMR repeater. This latest October 17 version has been corrected with TX Power now set to HIGH on all DMR repeaters as well as a few other minor improvements. Please please update your RT3S to this latest codeplug.
Please note ORARC recently commissioned an additional DMR repeater, VK2RPM, on November 18 2023. This new repeater has been in the planning for some time and is already included in the current code plug file below.
The ORARC codeplug was originally developed for the Retevis RT3S for ORARC members when VK2RCN (ORARC’s DMR repeater) was installed in 2021. It was primarily created to assist ORARC members who are new to the world of DMR, however it will be useful for any Australian Amateur as a starting point and particularly for NSW amateurs as it also includes all the VK2 FM repeaters. The latest version now includes Port Macquarie’s newest DMR repeater, VK2RPM which was commissioned in November 2023.
The codeplug contains two Hotspot zones (one for DMR and one for Brandmeister), all current VK DMR repeaters and the VK2 FM repeaters.
The code plug should be installed into your RT3S using the current version of the RT3S programmer. Before writing the code plug to your radio will need to make a few edits.
- On the ‘General Settings’ page, enter your call sign under ‘Radio Name’. Enter your DMR ID under ‘Radio ID’. Enter your call sign under ‘Screen Line 1’. Enter your DMR ID under ‘Screen Line 2’.
- If you have one or more hotspots, you will need to enter your hotspot frequencies into the appropriate channels. Hotspot channels are conveniently listed at the top of the channel list. There are 46 channels listed under the ‘DMR Hotspot’ heading and 25 channels listed under the ‘BM Hotspot’ heading. Simply enter the appropriate transmit and receive frequencies.
Included with the codeplug is documentation that should help beginners install the codeplug themselves.
IMPORTANT: DO NOT INSERT OR DELETE CHANNELS USING THE RETEVIS PROGRAMMER. It will corrupt the zone list. The zone list does not track the changes in channel positions so adding or deleting channels will corrupt it. With 55 DMR repeaters each containing 46 channels, its a lot of work to sort when things go awry. I would suggest any new channels should be added to the END of the current channel list. Further integration of the channels into zones etc should be done using N0GSG’s ‘Contact Manager’ program which tracks the various call groups and digital contacts much better.
As always, make backups of your code plugs before making any changes and always save new versions to a different file name so you can recover from any issues.
You can download the latest Retevis RT3S codeplug immediately below:
G6AMU Codeplug Editor
The following codeplug editor was created by Cathy G6AMU. There are actually two versions of this editor. This is the older version. I don’t use the newer version because it corrupts my codeplug.
This codeplug editor has one useful feature. It allows you to download a Contact list of DMR users from the RadioID.Net database directly into the codeplug and transfer them to your contacts. In addition, since the database is getting large you have the option to download uses from a ‘Last Heard’ list. This selects only the active DMR users and removes the thousands of registered DMR users who are never actually on the air, thereby freeing up valuable memory in your radio.